Texture Exporter/Use it
The Scene panel
Every texture in your scene in one list, with details, object selection, renaming and the export buttons.
Properties ▸ Scene ▸ Texture Export is where you manage the textures of the whole scene: their settings, where they’re written, and the glTF they belong to.
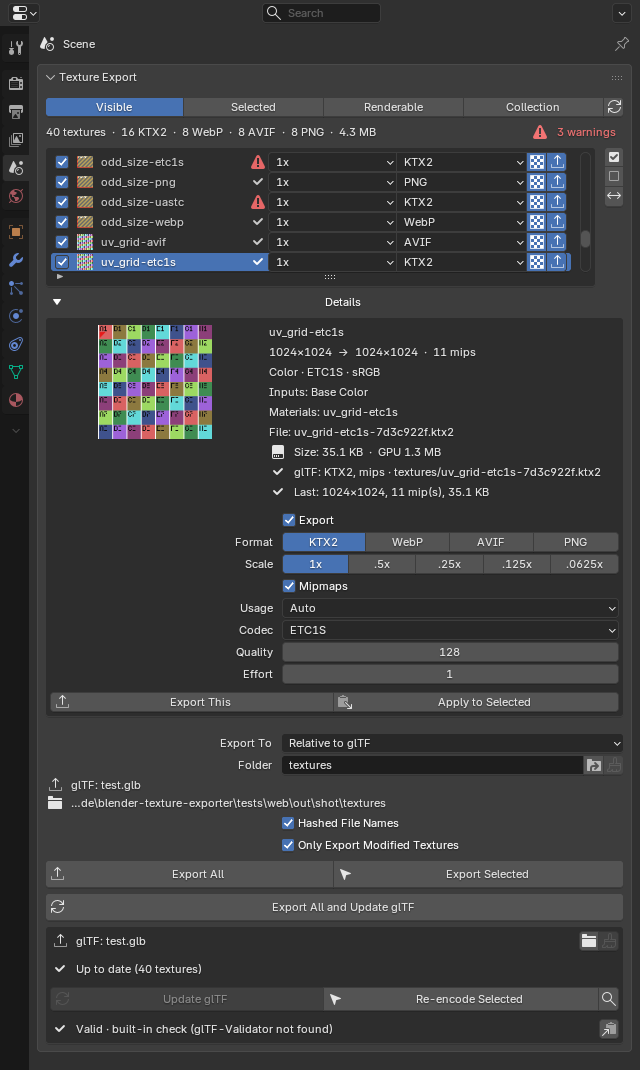
The texture list
Each row shows the texture’s thumbnail and name, its export state, scale, format, mipmaps, the preview toggle (eye) and the Export toggle. The line above it sums up the list: how many textures, how many of each format, the total size, and how many warnings.
- Visible / Selected / Renderable / Collection filter the list by the objects that use each texture. They combine, and with none on, the whole scene is listed. Collection means the active collection and its children. The refresh button rescans the scene.
- Tick the checkbox on rows to select them for Apply to Selected and Export Selected. The buttons beside the list tick all, none, or invert.
- The status icon shows the texture’s state: Exported, Settings changed (needs exporting again), a warning, or file missing / not saved.
Packed textures
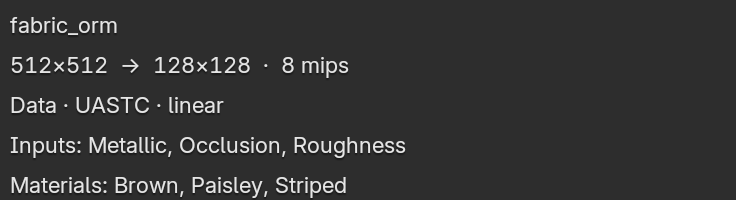
When Blender’s glTF exporter would pack images together, for example Metallic and Roughness from two separate images into one texture, the list shows them as one row, the same way the exporter does. An ORM map that feeds several inputs is listed once, with every input it feeds.
Renaming the exported file
Double-click a texture’s name to rename the file it exports to. Only the exported file changes; the image in Blender keeps its name.
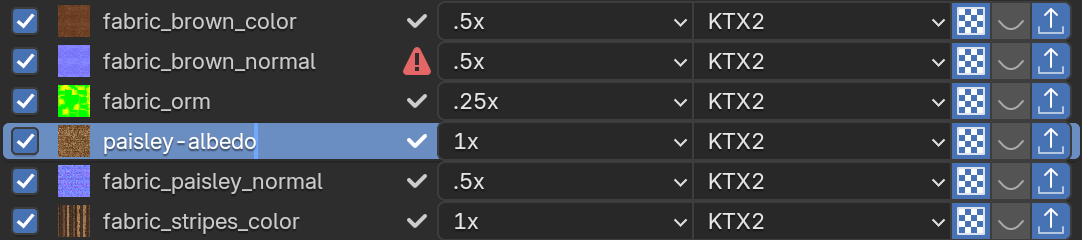
- The name is made file-safe:
Glow Map.pngbecomesGlow_Map. - If two textures end up with the same name, the second gets
-2. - Clear the name to go back to the image name.
- A renamed texture shows Settings changed. Update glTF writes the new file and points the glTF at it. The old file stays until you use Clean Up.
You can rename in the glTF export window’s list too.
Details
Open Details under the list to see the active texture:
- Source → output size, the number of mipmaps, and the detected usage (Colour, Data or Normal) with the codec and colour space.
- Inputs: which shader inputs it feeds, and Materials: which materials use it.
- Size: the estimated file size before export, the real size after, and the GPU memory it takes.
- glTF: how the last exported glTF references it, and Last: what the last export wrote.
- Any warnings, with what to do about them. See Warnings.
- The texture’s settings: see Texture settings.
Select Objects
Select Objects (N) selects every object whose materials use the texture and makes one of them active. Shift-click adds them to the current selection. The dropdown next to it lists the objects; pick one to select just that object.
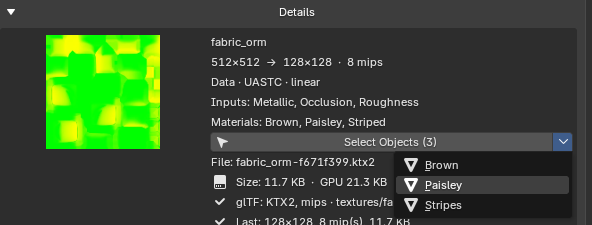
Hidden or unselectable objects are greyed out and skipped. It needs Object Mode.
Exporting
| Button | What it does |
|---|---|
| Export This (in Details) | Encodes the active texture, always, even if it hasn’t changed. |
| Apply to Selected (in Details) | Copies the active texture’s settings to every ticked texture. |
| Export All | Encodes every texture that has Export on. |
| Export Selected | Encodes the ticked textures. |
| Export All and Update glTF | Export All, then Update glTF on the last exported glTF. Disabled until you’ve exported a glTF. |
If the folder is the glTF’s own texture folder, the update only repoints the glTF at the new files. Otherwise it also encodes them into the glTF’s folder.
Export To
Where the Scene panel writes textures:
| Option | Folder |
|---|---|
| Relative to glTF (default) | Typed, relative to the last exported .glb / .gltf. The default textures is the folder the glTF export uses, which keeps that glTF in sync. |
| Relative to .blend | Typed, relative to the .blend file. |
| Folder | Picked with the file browser (default //textures/). |
.. goes up a level, e.g. ../textures. The resolved folder shows underneath.
Hashed File Names
Names files <image>-<hash> so several .blend files can share one texture folder. See Sharing a texture folder.
Only Export Modified Textures
On by default, here and in the glTF export window. Exports skip textures whose last exported file is still in the folder with the current settings.

- The first export writes everything. After that, only textures that were changed, never exported to this folder, painted and not saved, or whose file was deleted are encoded.
- Export All and Export Selected skip the unchanged ones. Export This always encodes.
- A glTF export still references every texture. Unchanged ones keep their existing file.
A texture shows Settings changed after an edit, and goes back to Exported if you change its settings back to what was last exported.
Settings are saved in the .blend
Format, scale, codec, quality, mipmaps and the output name are stored on the image, so they follow it when it’s appended or linked into another .blend. Packed-texture settings, the folder, Hashed File Names and the glTF export options are stored in the scene. Nothing lives in your Blender preferences, so everyone who opens the file exports the same textures.