Texture Exporter/Get started
Quick start
Export a GLB with web-ready textures, then adjust textures and update it without re-exporting the scene.
The usual way to work: export the GLB once from Blender’s glTF exporter, then fine-tune textures from the Scene panel and update the GLB in place.
1. Export the GLB
Open File ▸ Export ▸ glTF 2.0. In the sidebar, tick the header of the Texture Export (KTX2 / WebP / AVIF) section. It starts unticked, and the choice is saved with the scene.
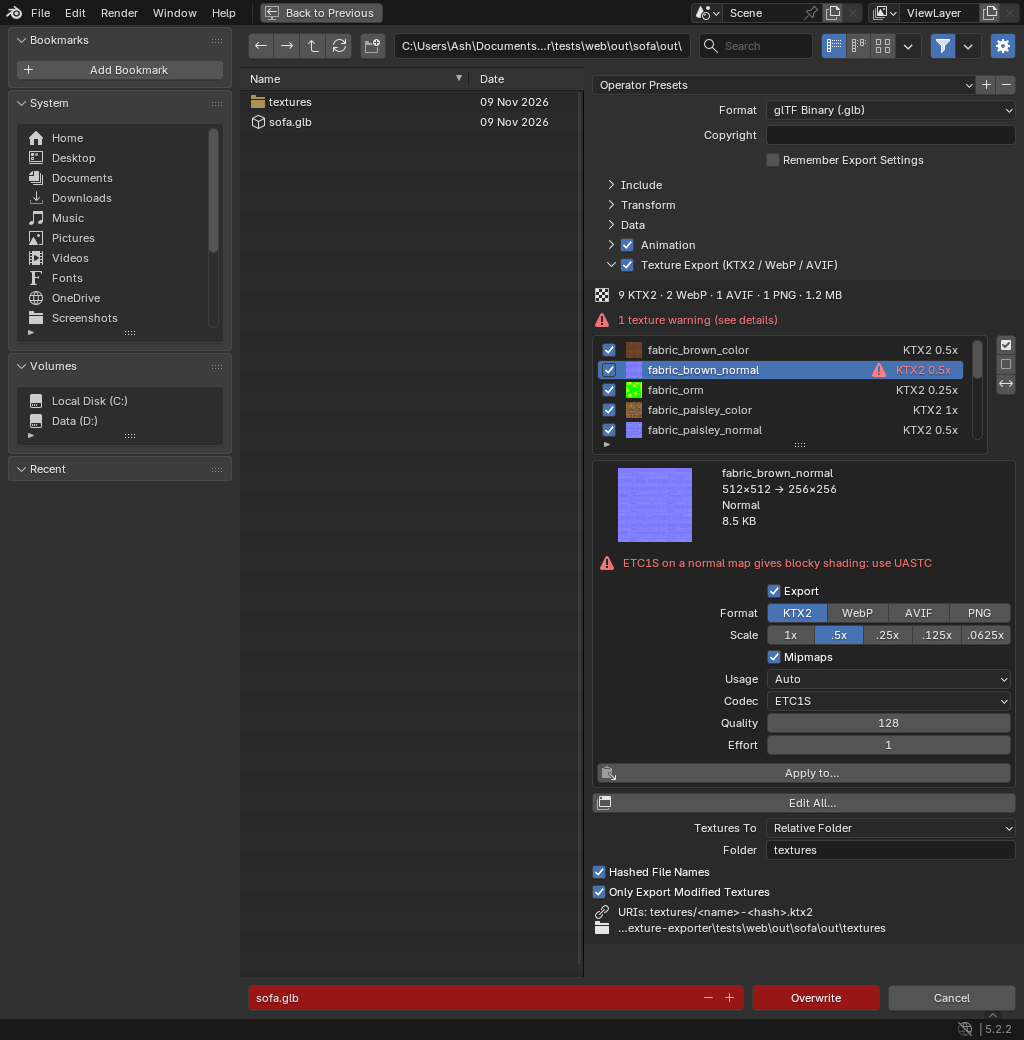
Export as usual. Every texture is encoded with its current settings (KTX2 by default) into a textures/ folder next to the .glb, and the GLB references those files. The add-on remembers this as the last exported glTF.
2. Open the Scene panel
Go to Properties ▸ Scene ▸ Texture Export. It lists every texture your objects’ materials use. Export To is already set to Relative to glTF with the folder textures, so it writes into the same folder the GLB uses.
3. Adjust textures
Pick a texture in the list and change its format, scale or quality. As you go:
- Details shows the estimated file size, the GPU memory and any warnings.
- The eye on a row previews the texture on your models exactly as it will be exported, and updates as you change settings.
- Apply to Selected copies the active texture’s settings to the textures you’ve ticked.
- Select Objects selects the objects that use the texture, so you can see where it is.
Texture settings explains every option.
4. Export and update the GLB
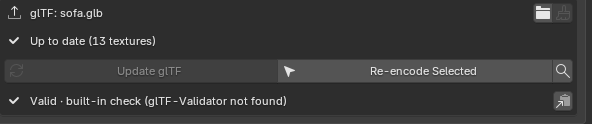
Click Export All and Update glTF. Only textures whose settings changed are encoded again (with Only Export Modified Textures on, the default), and the GLB is repointed at the new files without re-exporting it: its geometry is copied byte for byte. The status box then says Up to date.
5. Re-export only when the scene changes
You only need to export the GLB again when meshes or materials change, or to bring back a texture you’d left out. Unchanged textures keep their existing files.
Then load the GLB in three.js: Loading in three.js.