Texture Exporter/Get started
Getting started
Install Texture Exporter, turn on updates with your licence key, and check the tools it uses.
Install
Texture Exporter is sold on Payhip. Your purchase comes with one zip per platform and a licence key, which gets you updates inside Blender. There’s no limit on how many of your own machines you use it on.
-
Download the zip for your platform, e.g.
texture_exporter-<version>-windows_x64.zip. -
In Blender, open Edit ▸ Preferences ▸ Get Extensions. In the ⌄ menu at the top right, choose Install from Disk… and pick the zip.
-
Go to Add-ons, search for Texture Exporter, and expand it. Its preferences hold Updates, KTX-Software, glTF Validation and the Report a Bug button:
Preferences ▸ Add-ons ▸ Texture Exporter 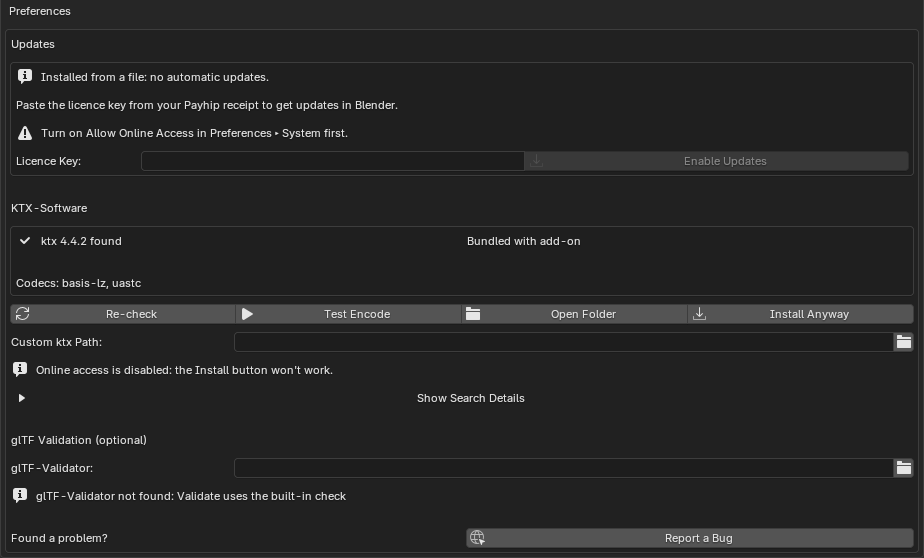
The add-on is ready to use now. Next: the quick start, or set up updates first.
Turn on updates
-
Turn on Allow Online Access in Preferences ▸ System. Without it, Enable Updates stays greyed out.
-
Paste your licence key under Updates. It’s in your Payhip receipt email.

-
Click Enable Updates. This checks the key, adds the Texture Exporter Updates repository with the key as its access token, and reinstalls the add-on from it, keeping your settings.
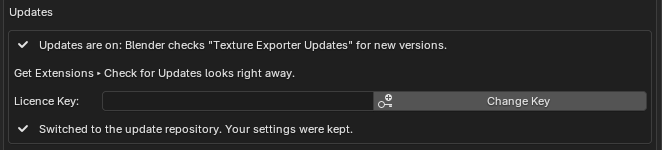
From then on, new versions show an Update button in Get Extensions. Blender checks on startup, or straight away with Check for Updates in the same ⌄ menu. Change Key replaces the key if you get a new one.
If updates don’t work
-
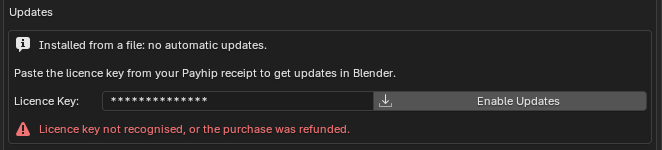
“Licence key not recognised, or the purchase was refunded.” Copy the key again from your Payhip receipt, without spaces around it. Refunded purchases stop getting updates.
-
Enable Updates is greyed out. Turn on Allow Online Access in Preferences ▸ System.
-
Get Extensions says “HTTP Error 401” for Texture Exporter Updates. The key stored on the repository isn’t accepted any more. Paste your current key and click Change Key.
-
“The licence check is unavailable right now.” The update server or Payhip is down. Your installed copy keeps working; try again later.
-
Offline machines. Install the zip from your purchase. The add-on works fully offline; only updates need online access.
Setting up the update repository by hand
In Get Extensions ▸ Repositories ▸ + ▸ Add Remote Repository, enter
https://tools.ashthornton.dev/blender-texture-exporter/index.jsontick Authentication, paste your licence key as the access token, and tick Check for Updates on Startup. Then uninstall the copy you installed from the zip and install Texture Exporter from the new repository.
Overview
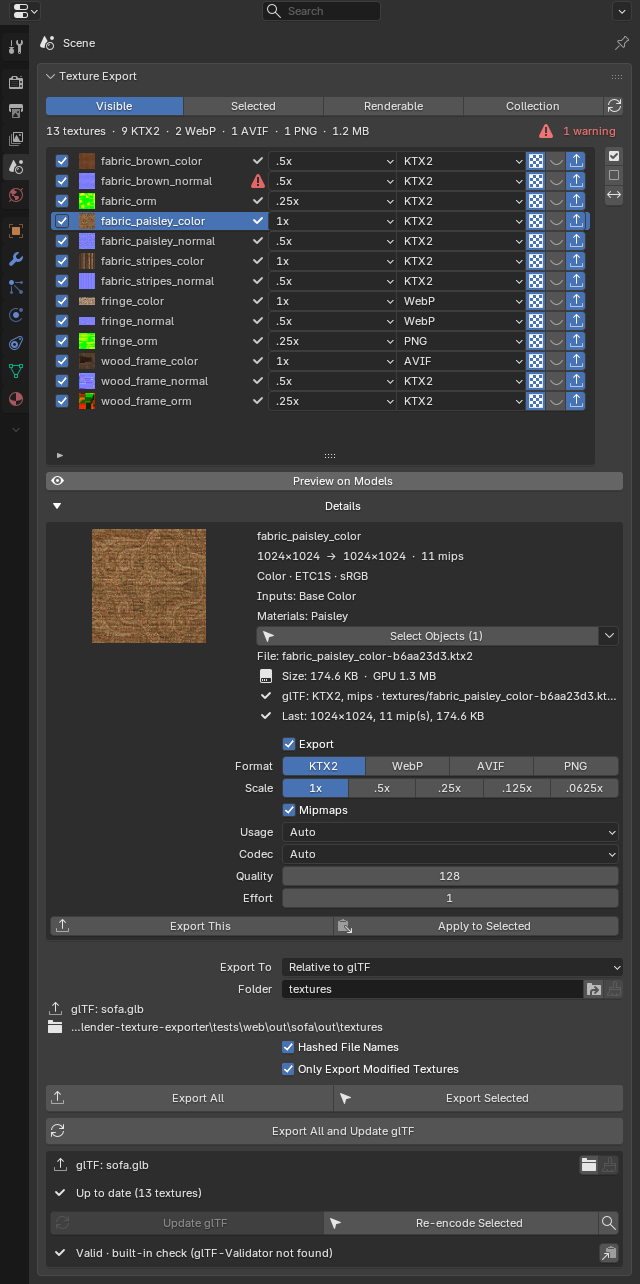
Texture Exporter writes your scene’s textures as separate KTX2, WebP, AVIF or PNG files, with settings for each texture, and links them from the glTF / GLB that Blender’s own glTF exporter writes. In Blender it’s listed as Texture Exporter (KTX2 / WebP / AVIF).
You use it in two places:
- Properties ▸ Scene ▸ Texture Export, where every texture in the scene is listed with its settings, a preview, and buttons to export and update the glTF.
- File ▸ Export ▸ glTF 2.0, where a Texture Export section in the sidebar encodes every texture as part of the export.
What you need
- Blender 4.2 or newer. Writing AVIF needs Blender 5.2; on older versions the format shows a warning.
- Windows (x64 or arm64), macOS (Apple Silicon or Intel) or Linux x64.
- Nothing else: the platform zips include KTX-Software 4.4.2, which encodes KTX2.
KTX-Software
KTX2 encoding uses KTX-Software’s ktx tool. The platform zips include it, and the KTX-Software box in the preferences should say ktx 4.4.2 found · Bundled with add-on. WebP, AVIF and PNG don’t need it.
If it isn’t found (for example with the universal zip, or if the bundled copy can’t run on your machine):
- Install KTX-Software downloads the official release from GitHub into the add-on’s own folder, after checking its SHA-256. It needs Allow Online Access.
- Custom ktx Path points at your own install (version 4.3 or newer).
- Or put
ktxon your system PATH.
Test Encode encodes a small test image to check everything works. Re-check looks again after you change something.
glTF-Validator (optional)
Validate always runs a built-in check on the glTF it updates. If you also have the Khronos glTF-Validator, set its path in the preferences (or put gltf_validator on PATH) and Validate runs it too.